How to Set Up Styled KOT
How to Set Up Styled KOT
Vendtill POS App
Introduction
- Incorporating the Styled KOT feature into your POS system is a practical step toward improving kitchen operations. The enhanced visibility of critical information ensures that your kitchen staff can work efficiently, ultimately leading to a smoother and error-free dining experience for your customers.
POS App main menu > Select “ Settings ” > Select “Printers”
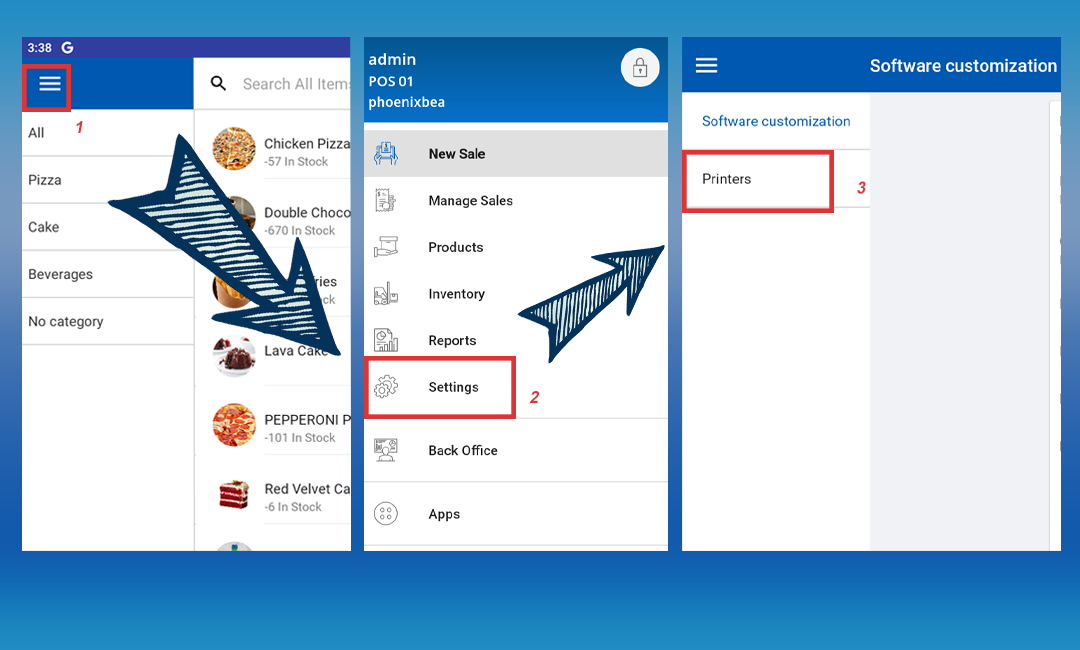
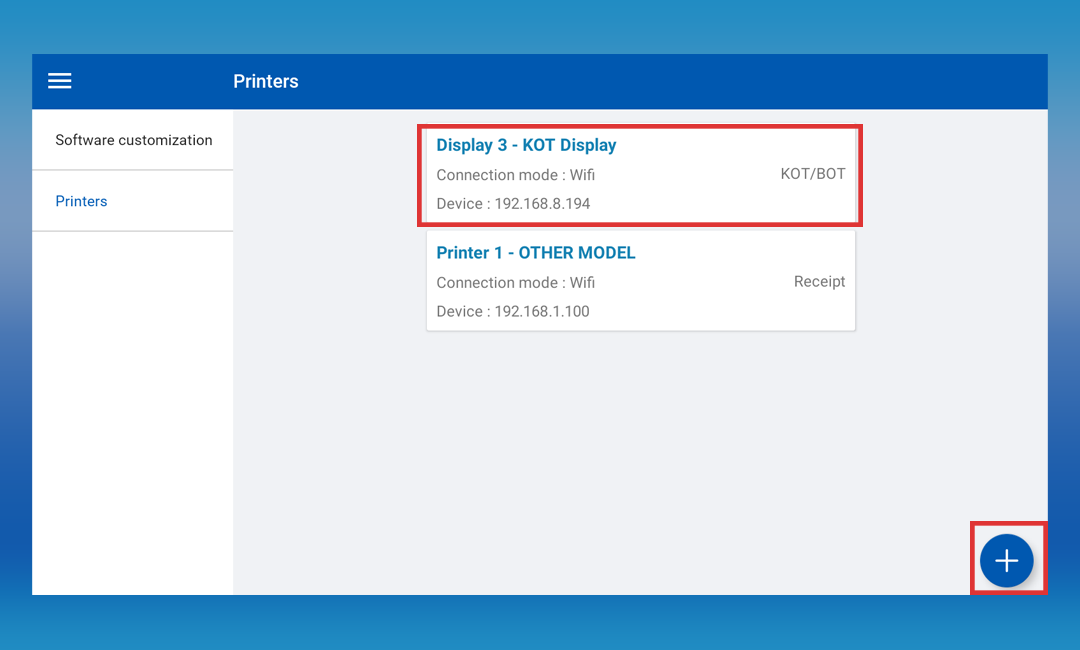
Click on the already created printer or click the “Add" (+) button
Tick On “Styled KOT”
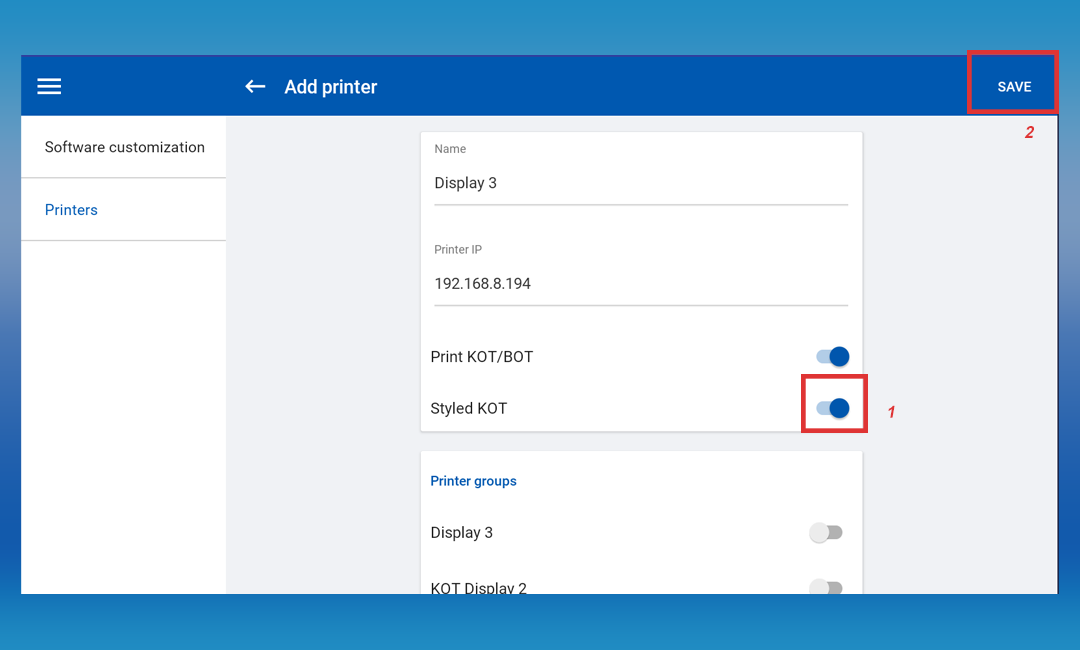
- Click 'SAVE'
Related Articles
How to Setup KOT Printers
How to Setup KOT Printers Step-by-step Process 1. Key considerations You can setup several Kitchen Order Ticket KOT / BOT Printers in the POS system. If your business has several POS Terminals, we recommend that you use more than one KOT printers. ...How to Set Up Styled Receipt Header
How to Set Up Styled Receipt Header Vendtill POS app Introduction The Styled Receipt Header feature in Vendtill POS App allows users to customize the appearance of specific fields on their receipts. By enabling this feature, key information such as ...KOT BOT Display App
KOT / BOT Display App Setup Step-by-step The Vendtill KOT / BOT Display App helps kitchen and bar staff view customer orders clearly. It connects with the Vendtill POS system and makes food and drink preparation faster and more accurate. Key Features ...Same Printer Receipts and KOT Printing
Printing Receipts and KOTs from the Same Printer Step-by-step guidelines The "Printing Receipts and KOTs from the Same Printer" option in the Vendtill POS System allows users to configure a single printer to print both receipts for customers and ...How to Create KOT Notes
How to Create KOT Notes Vendtill Back Office Introduction When sending a KOT to the kitchen, the system has the ability to send the KOT Note at the same time. This KOT can be a pre-arranged note. Login to POS Back Office >. Select “ Settings ” from ...