Customize Sale Screen
Customize Sale Screen (Favourite)
Step-by-step
How to Arrange the Sales Screen Using the Customize Sale Screen Feature
Vendtill POS now allows you to create a more personalized and efficient sales screen using the Customize Sale Screen feature. This enables you to arrange your products in a way that best suits your business needs—improving staff productivity and reducing the time required for each sale.
You can group items such as fast-moving products, complementary items, or organize products by time slots (e.g., Breakfast, Lunch, Dinner). This customization makes your POS interface more intuitive and user-friendly.
Why the Customize Sale Screen Is Useful
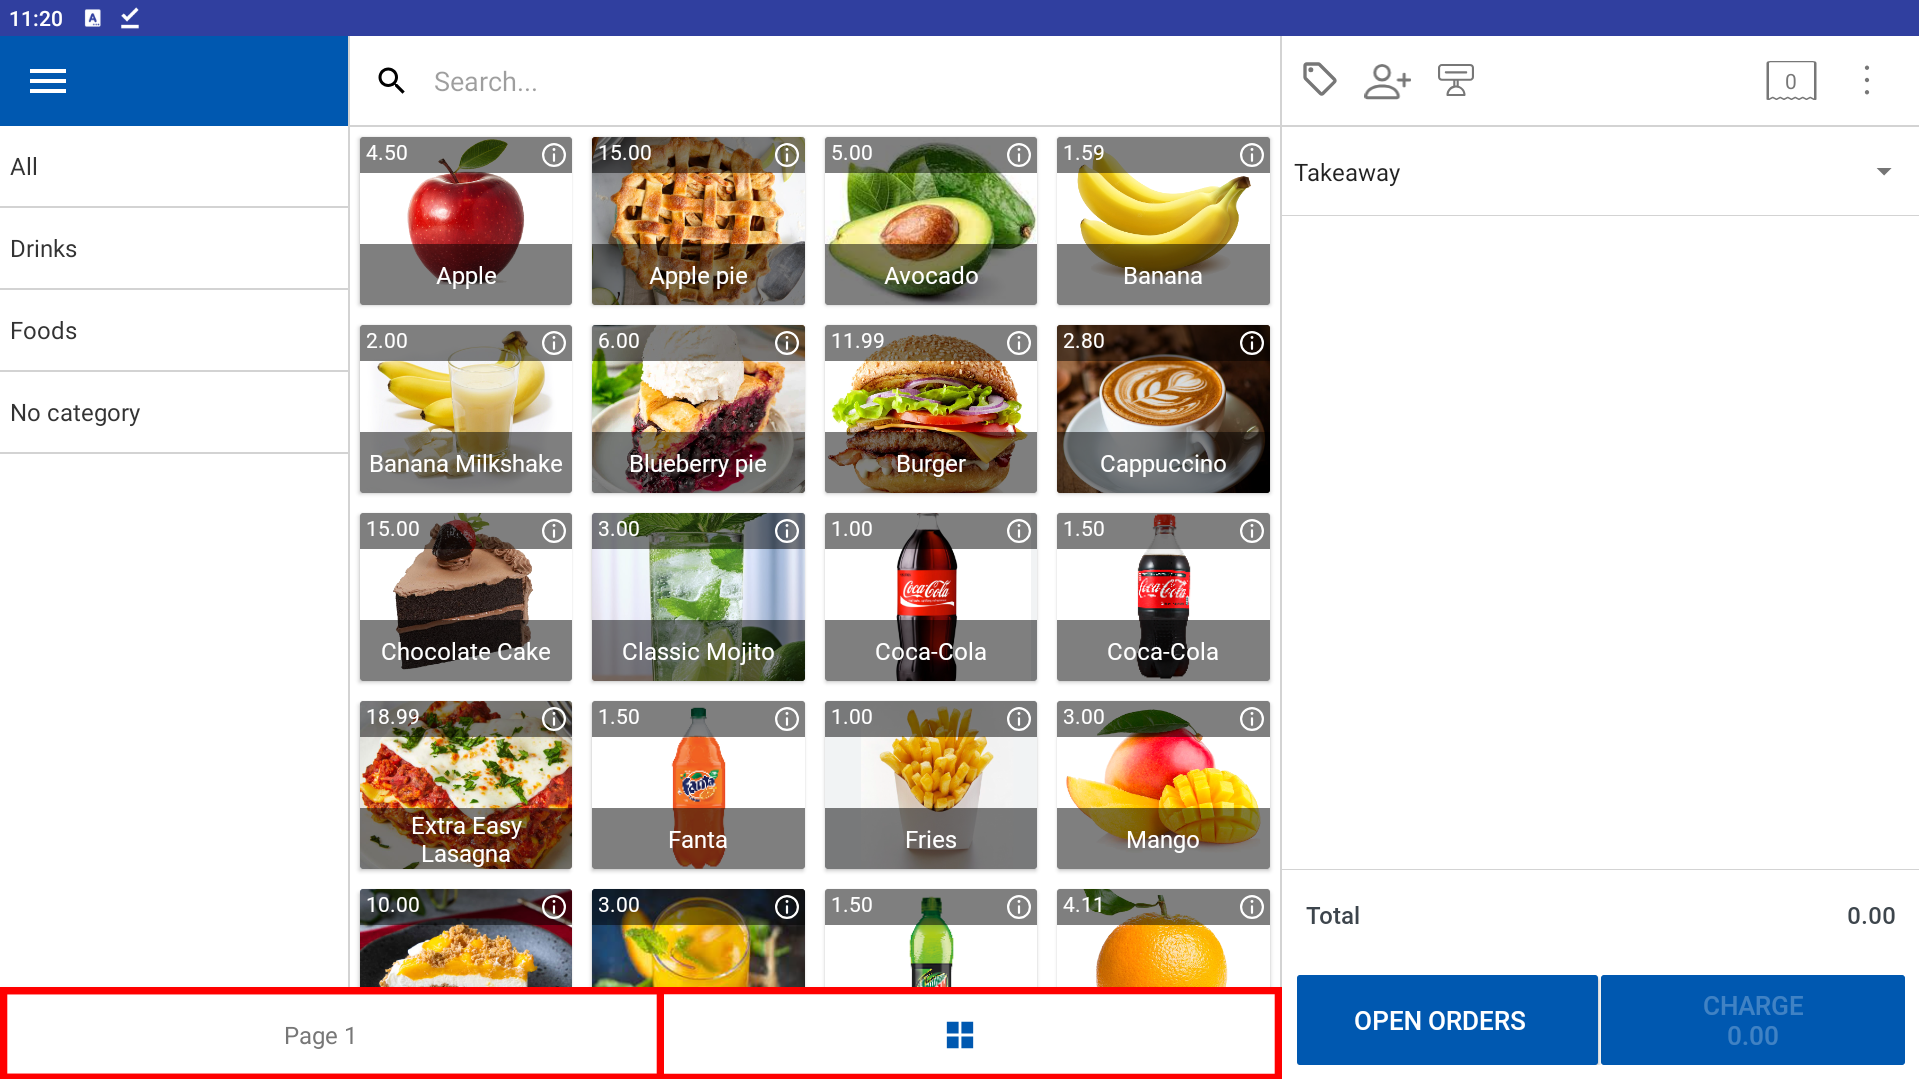
By default, Vendtill POS includes:
- Page 1: A customize sale screen with no products.
- Default Screen / Grid Icon Page: Displays products in alphabetical order (fixed and cannot be edited).
The Customize Sale Screen feature is ideal for businesses looking to streamline their product display. It helps you:
- Highlight fast-selling products – Keep top-selling items front and center.
- Group complementary items – For example, group tyres with tubes, or printers with ink.
- Categorize by time or usage – Arrange products by time (Breakfast/Lunch/Dinner) or business-specific needs like “Fast Movers” or “Best Sellers.”
This feature enables your staff to locate products quickly, speeding up transactions and improving overall customer experience.
The "Customize Sale Screen" feature in Vendtill POS is currently available only in landscape mode.
If you're using portrait mode, you can use the "Favourite Products" option instead.
Add Products to a Custom Sale Screen
How to Use the Customize Sale Screen
This section explains how to add frequently used products to a custom page for quick access. Create dedicated pages by product type, time, or popularity.
Steps:
- Open the POS App
- Go to the main screen (New Sale)
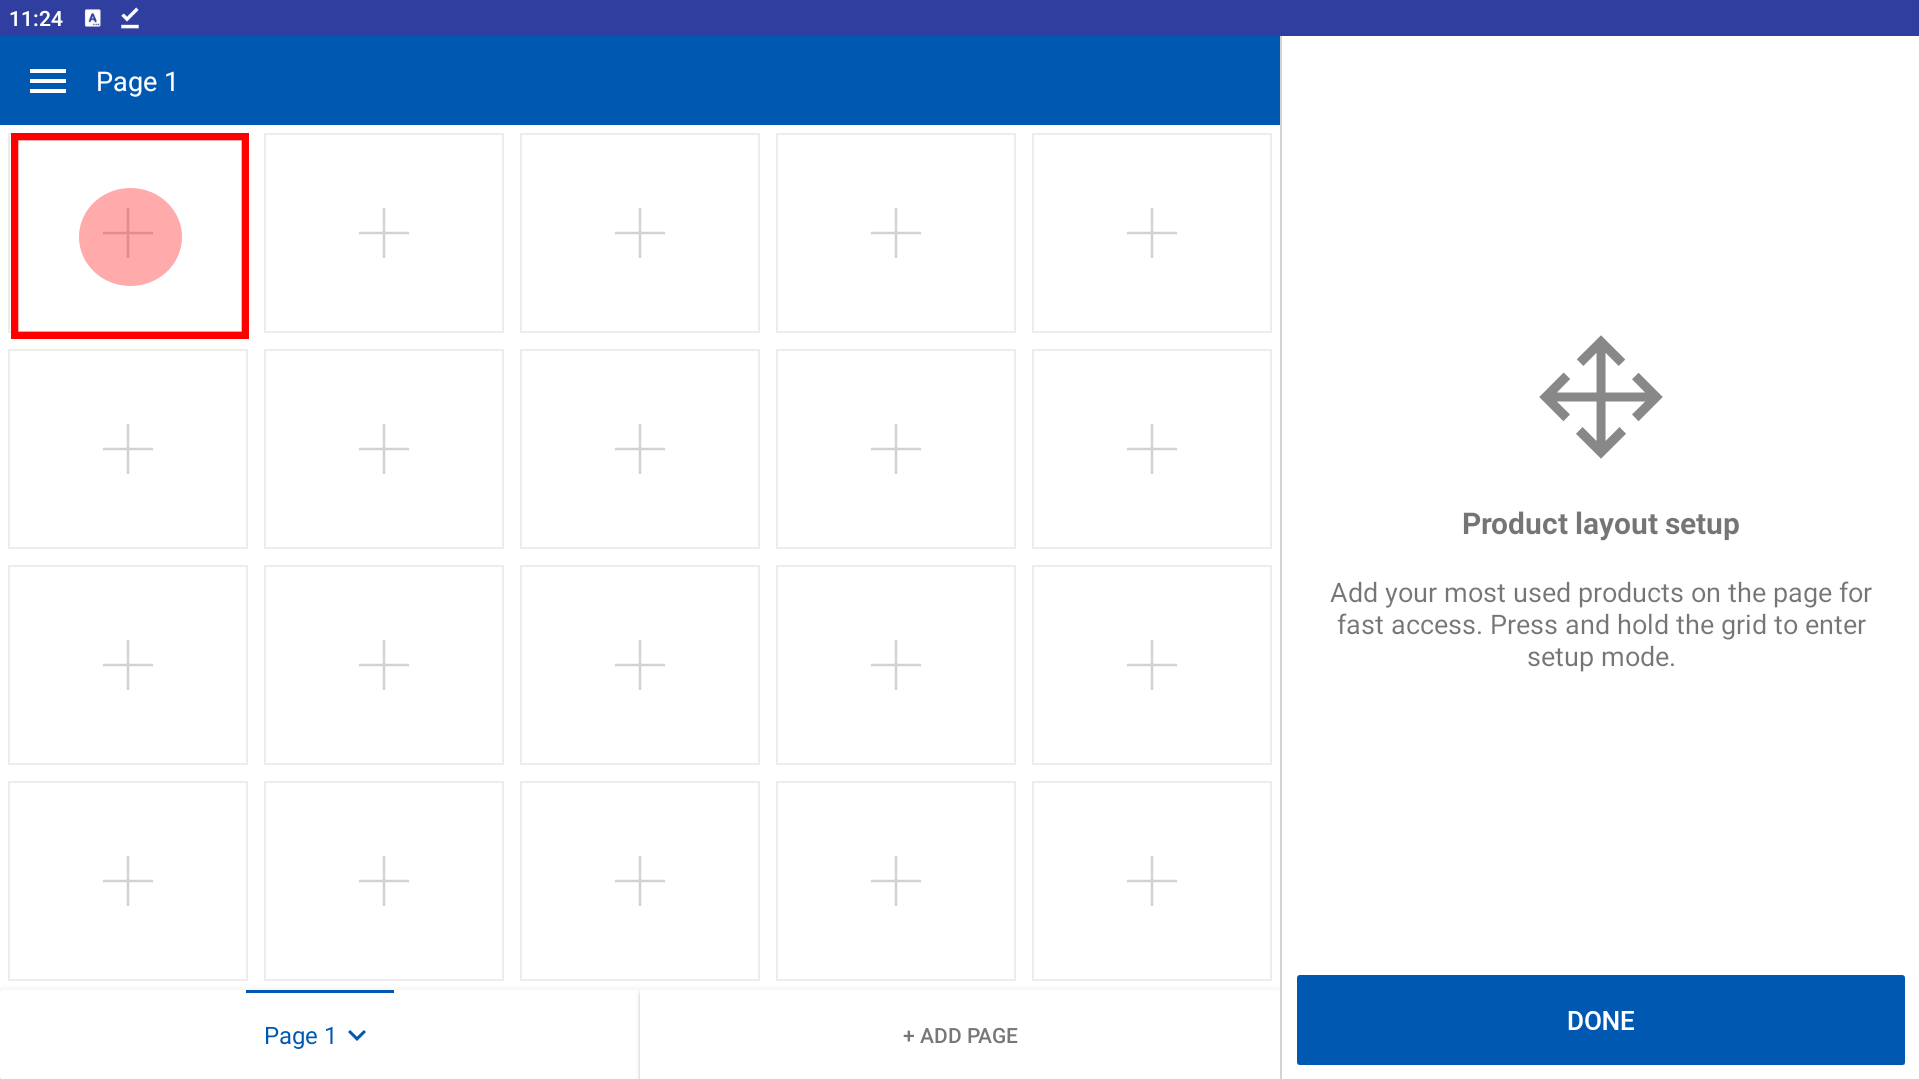
- Tap on Page 1 or any custom page
- Long press anywhere on the page until the Add Product (+) icon appears
- Tap the + icon, then select a product from the list
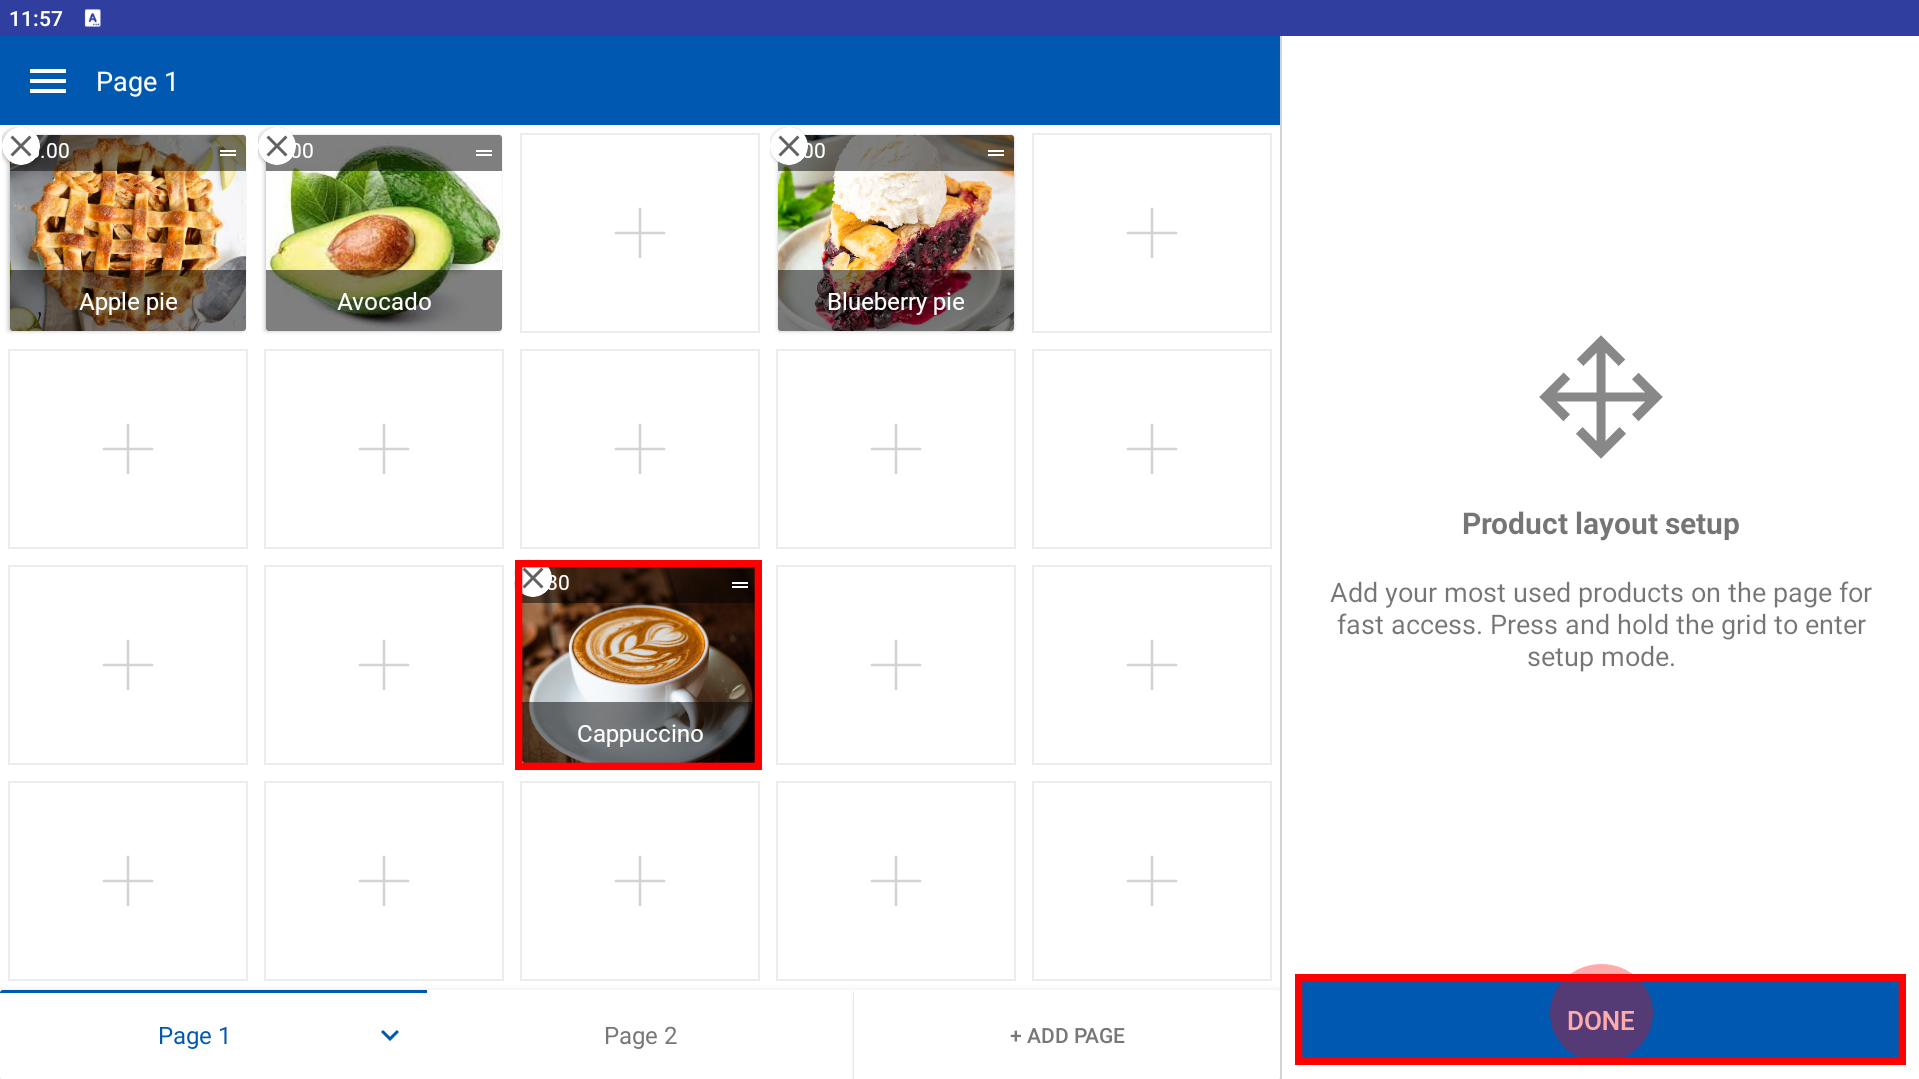
- Repeat for additional products
- Tap DONE to save your changes
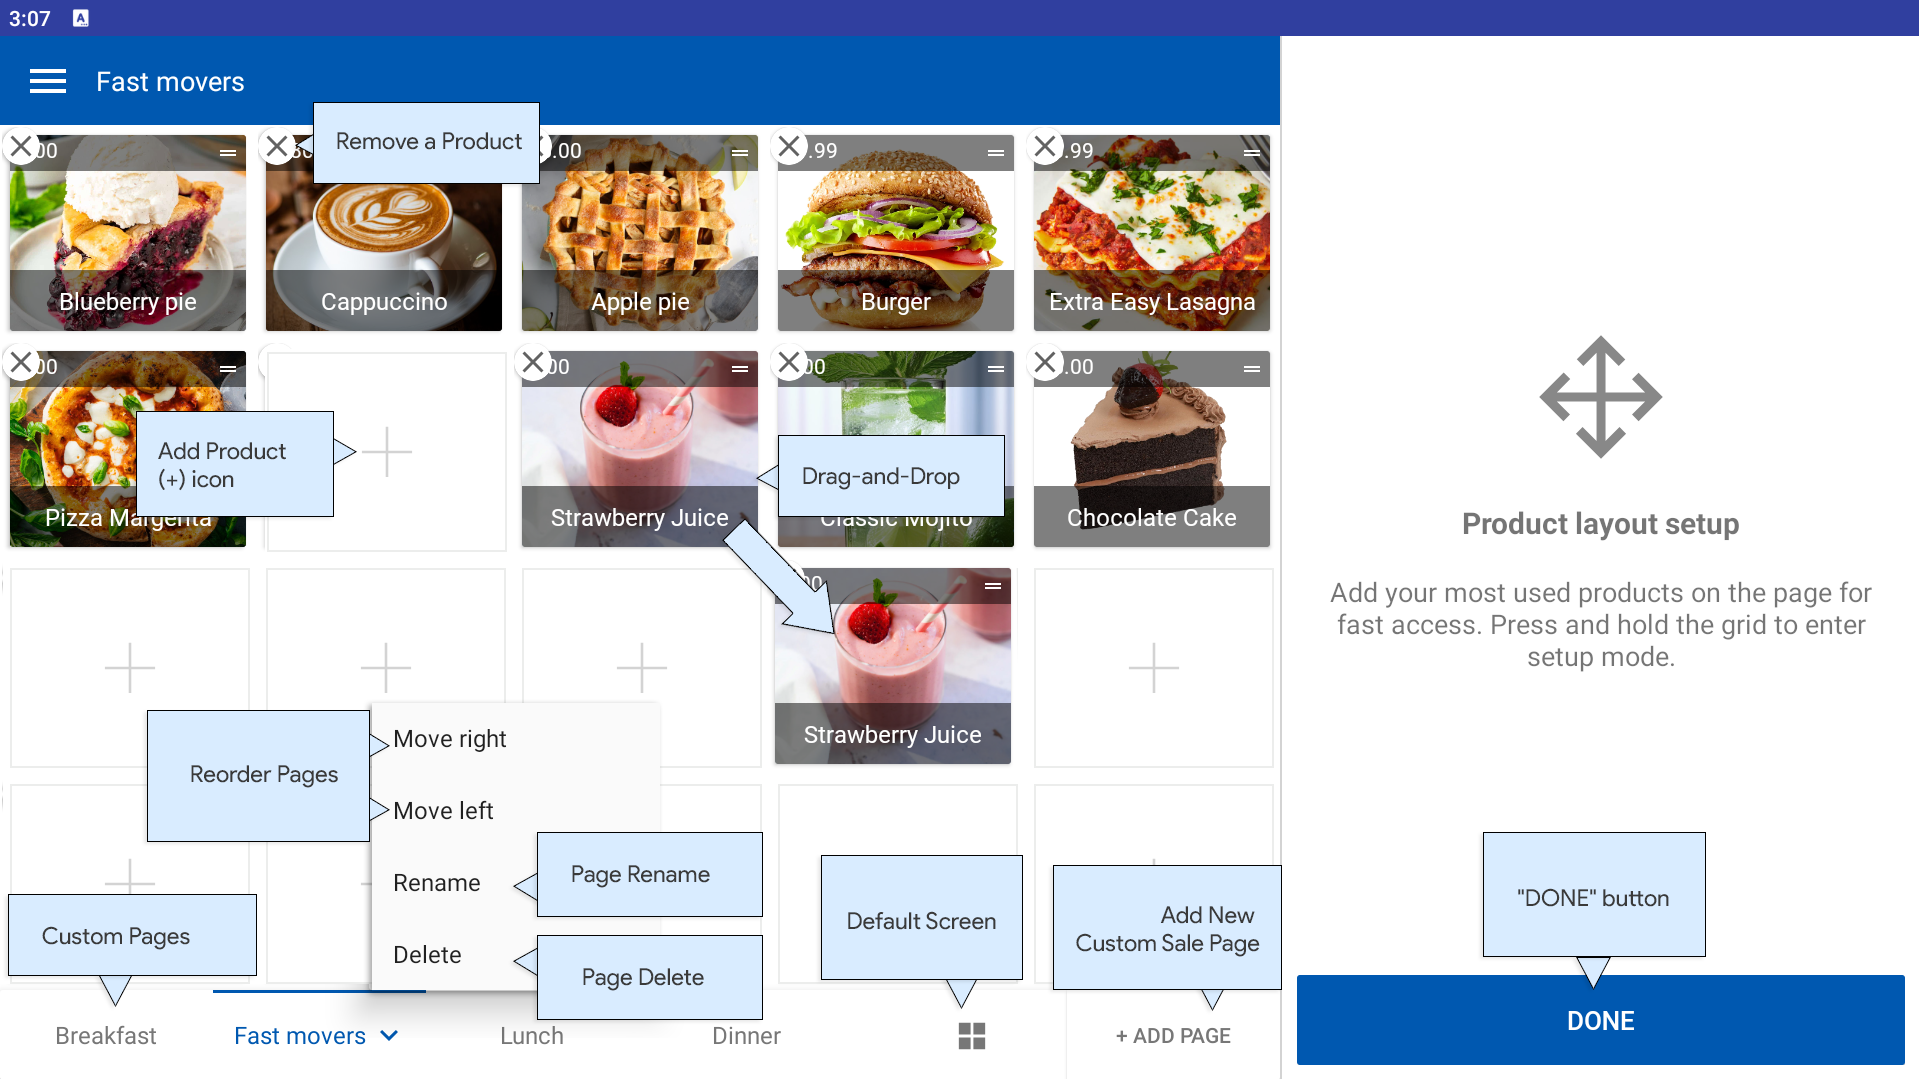
Rearrange Products on a Page
Adjusting the order of products helps prioritize items for quicker sales. This drag-and-drop feature makes customization easy.
Steps:
- Open the POS App
- Go to the New Sale screen
- Select the page to edit
- Long press to enter setup mode until the + icon appears
- Tap and hold a product
- Drag it to the desired location
- Tap DONE to save changes
Remove a Product from a Page
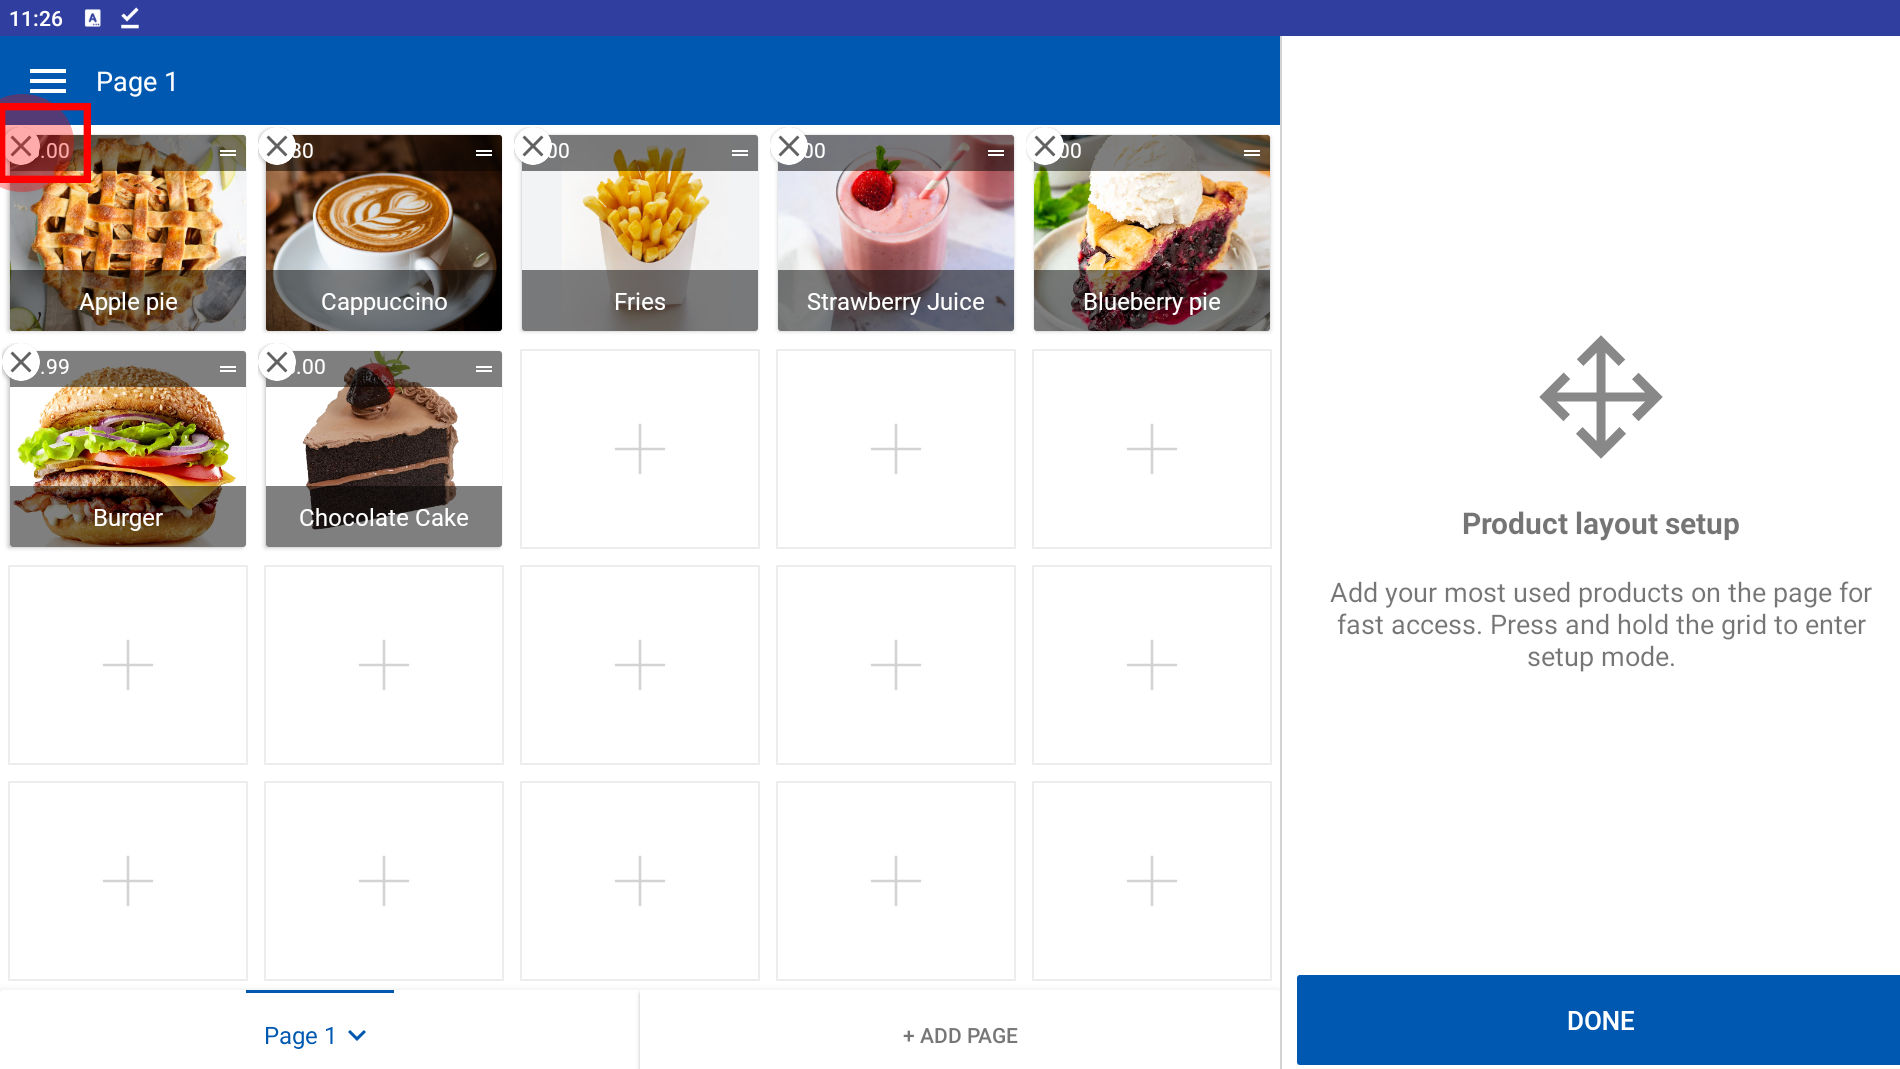
To keep your custom pages clean and up to date, you can easily remove unused items.
Steps:
- Open the POS App
- Go to the New Sale screen
- Select the page
- Long press to enter setup mode
- Tap the small X icon on the product to remove it
- Tap DONE to finish
Create a New Custom Sale Page
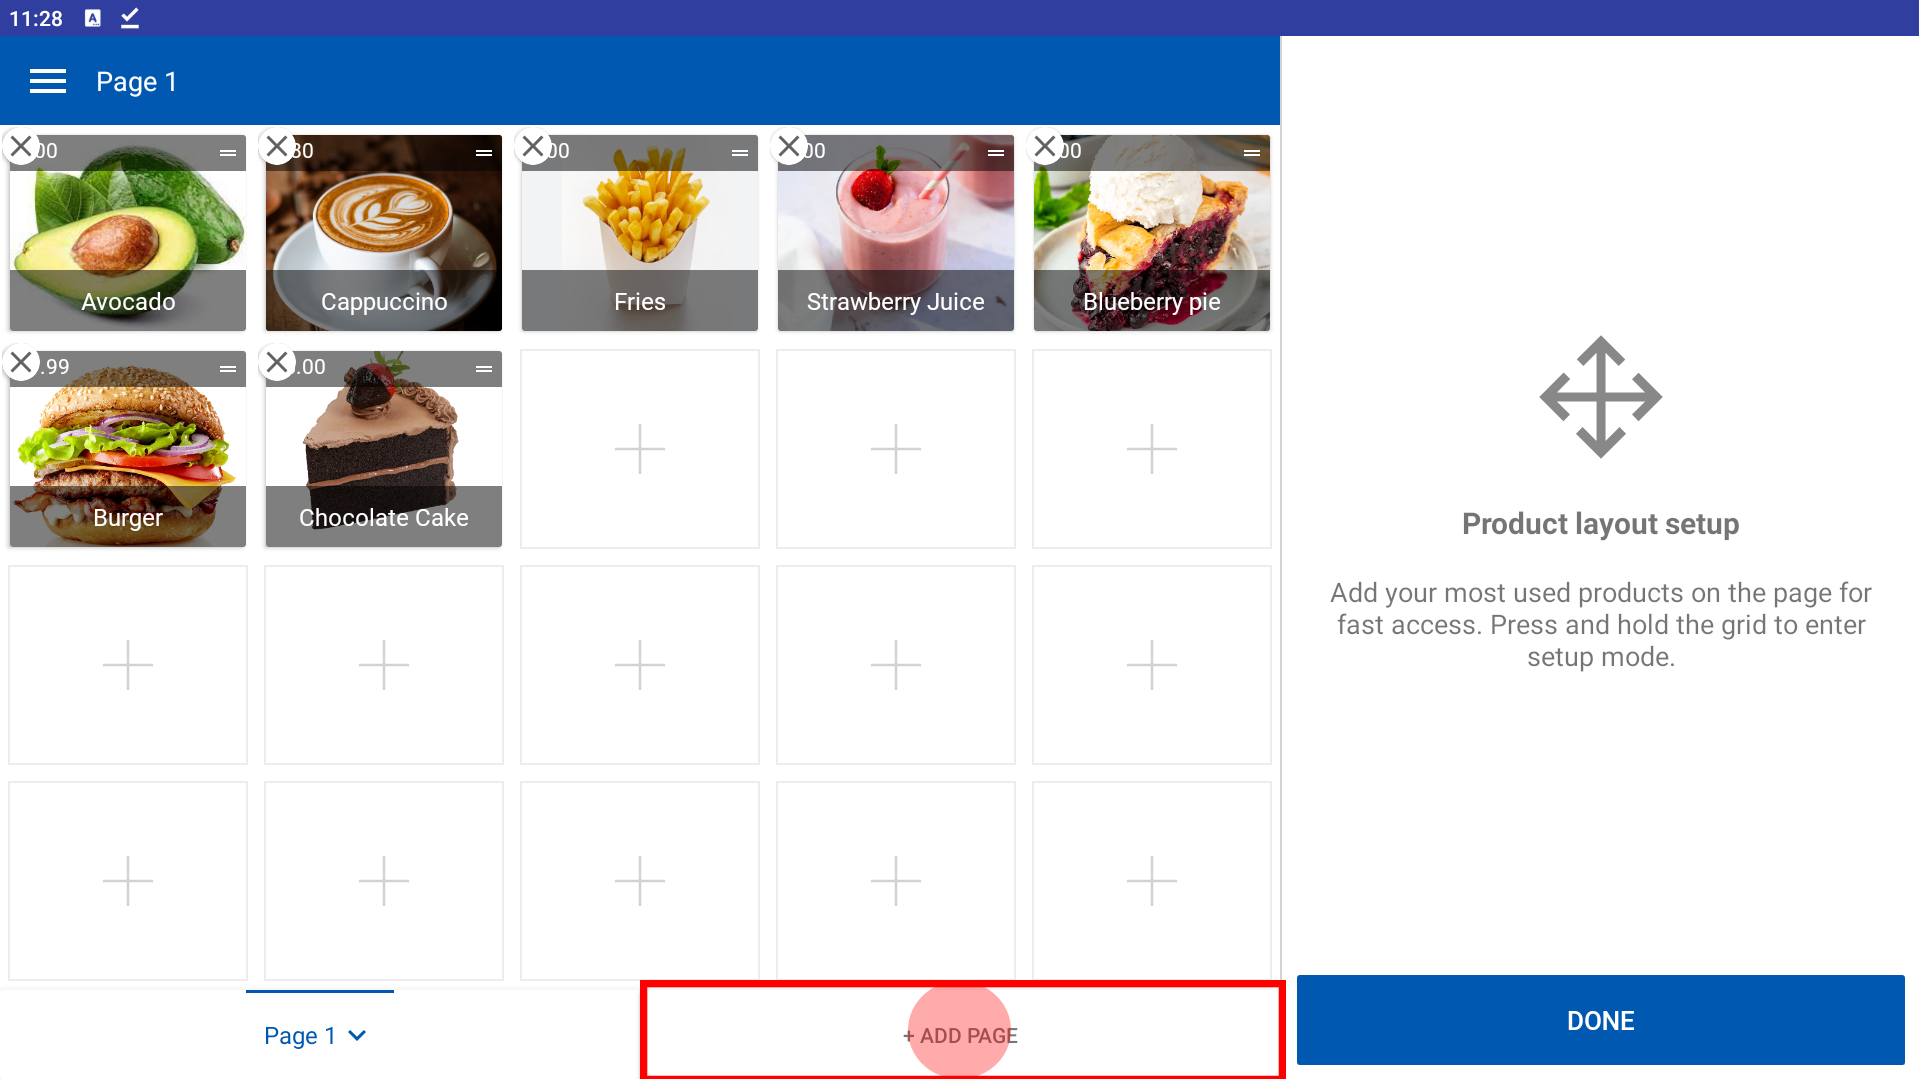
You can add more pages based on category, time slots, or custom themes.
Steps:
- Open the POS App
- On the New Sale screen, long press to enter setup mode
- Tap the Add Page icon
- A new page (e.g., Page 2, Page 3) will be created
Rename a Custom Sale Page
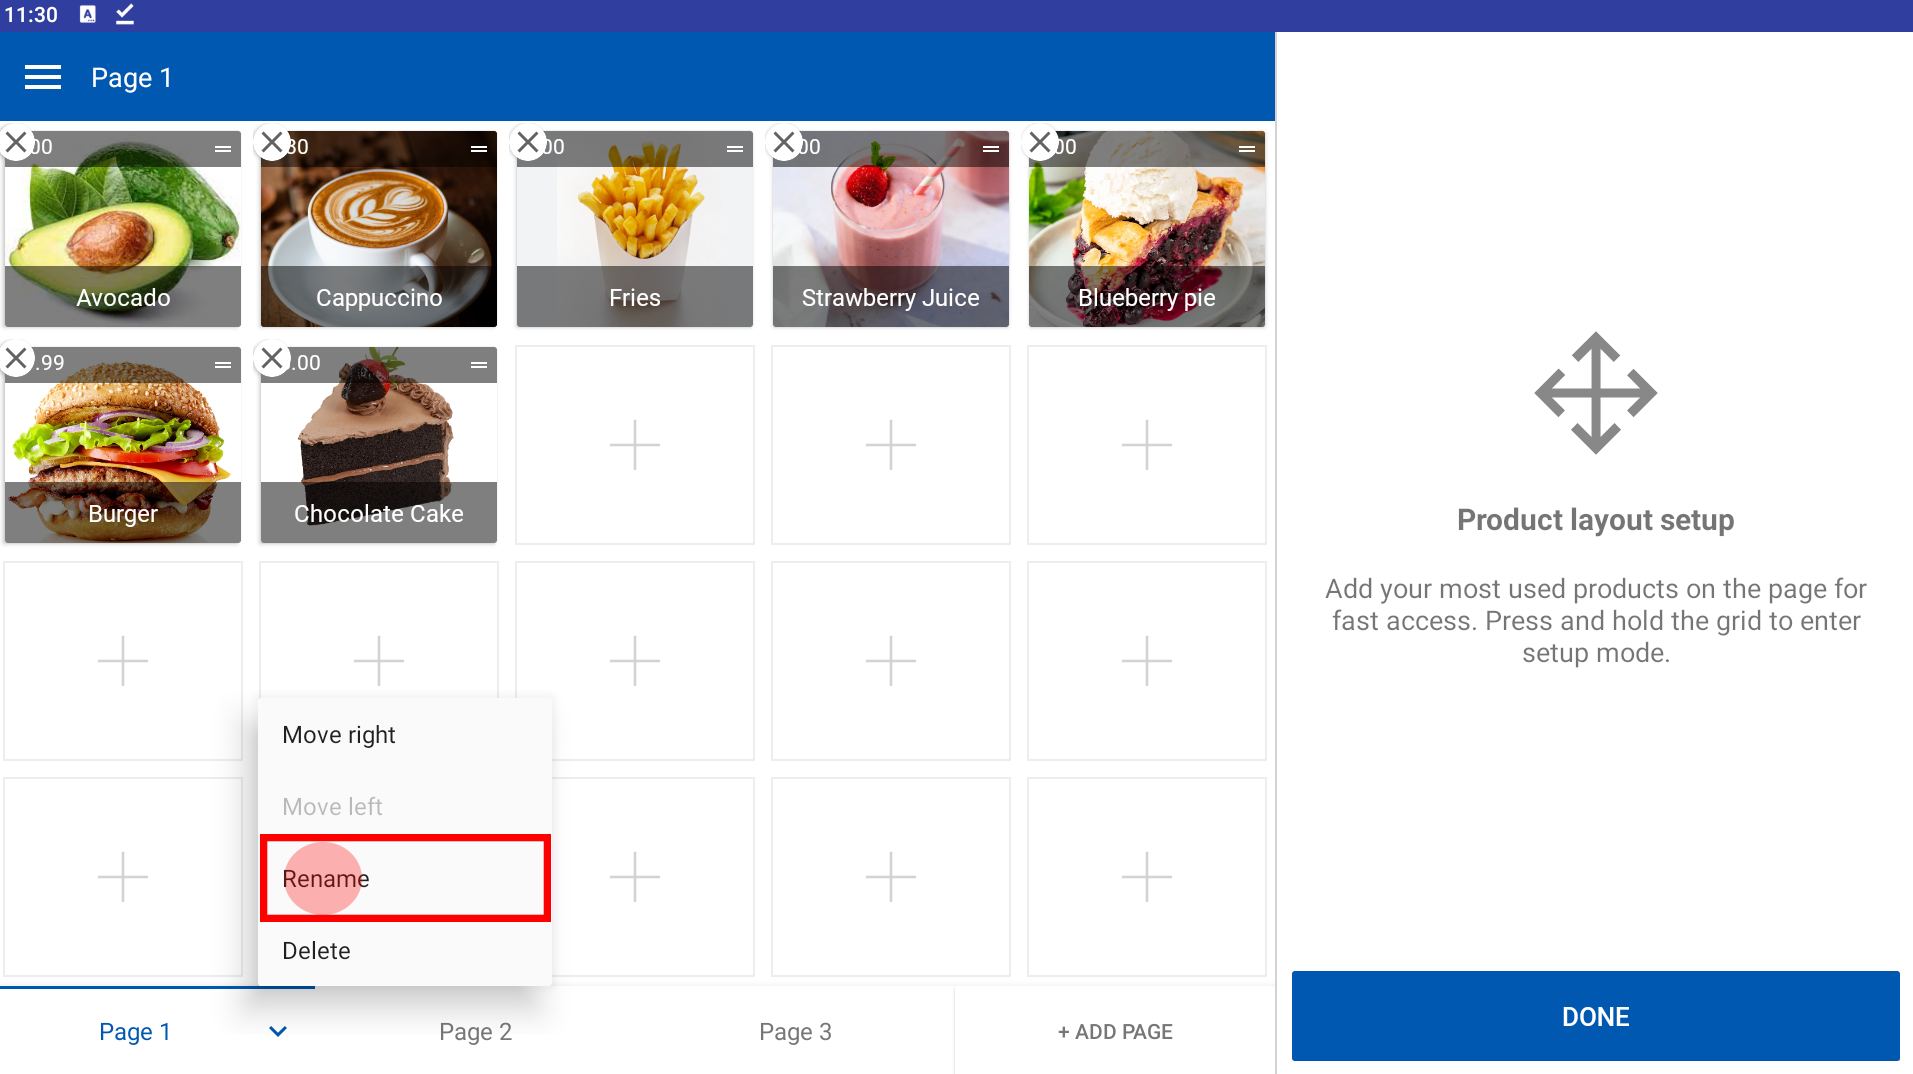
Renaming helps organize pages logically—like “Lunch,” “Beverages,” or “Fast Movers”—for easier navigation.
Steps:
- Open the POS App
- Go to the New Sale screen
- Select the page you want to rename
- Long press to enter setup mode
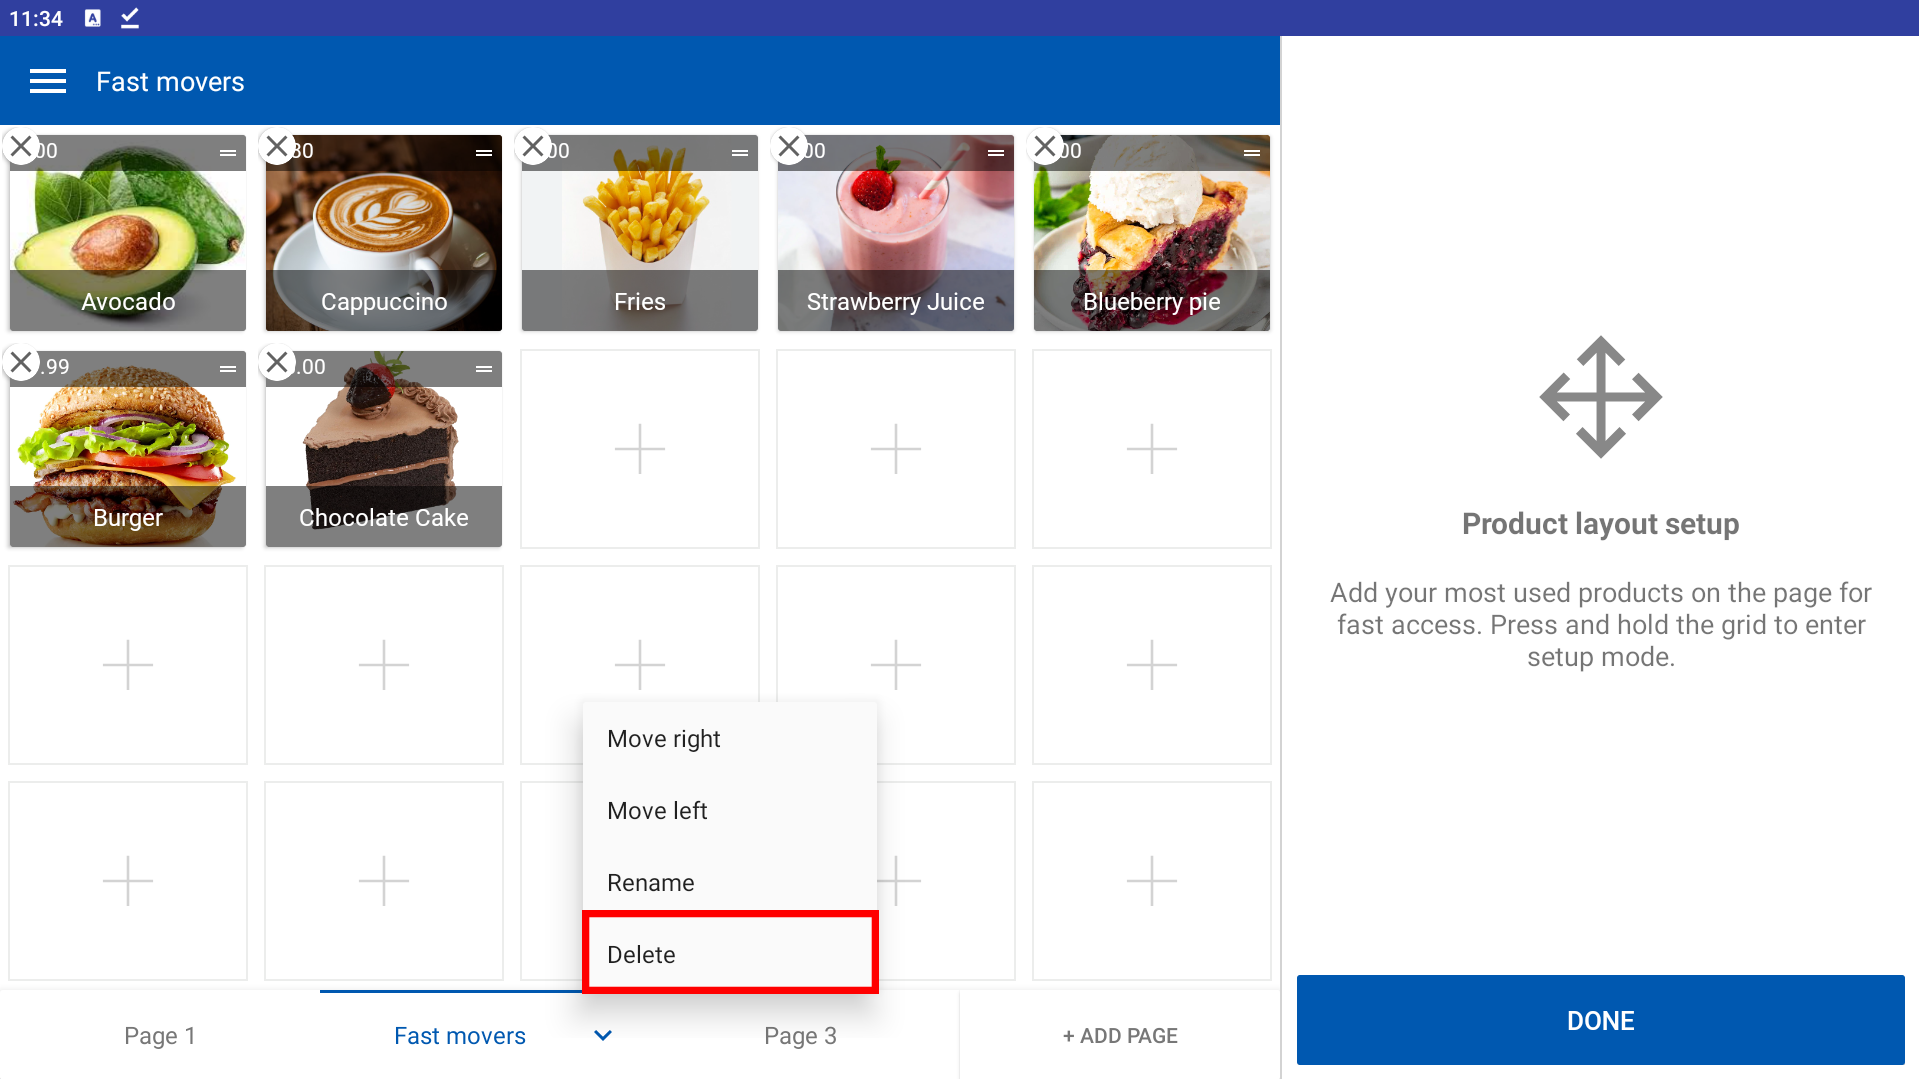
- Tap the dropdown arrow next to the page name
- Select Rename
- Enter a new name and save it
Reorder Pages (Move Left/Right)
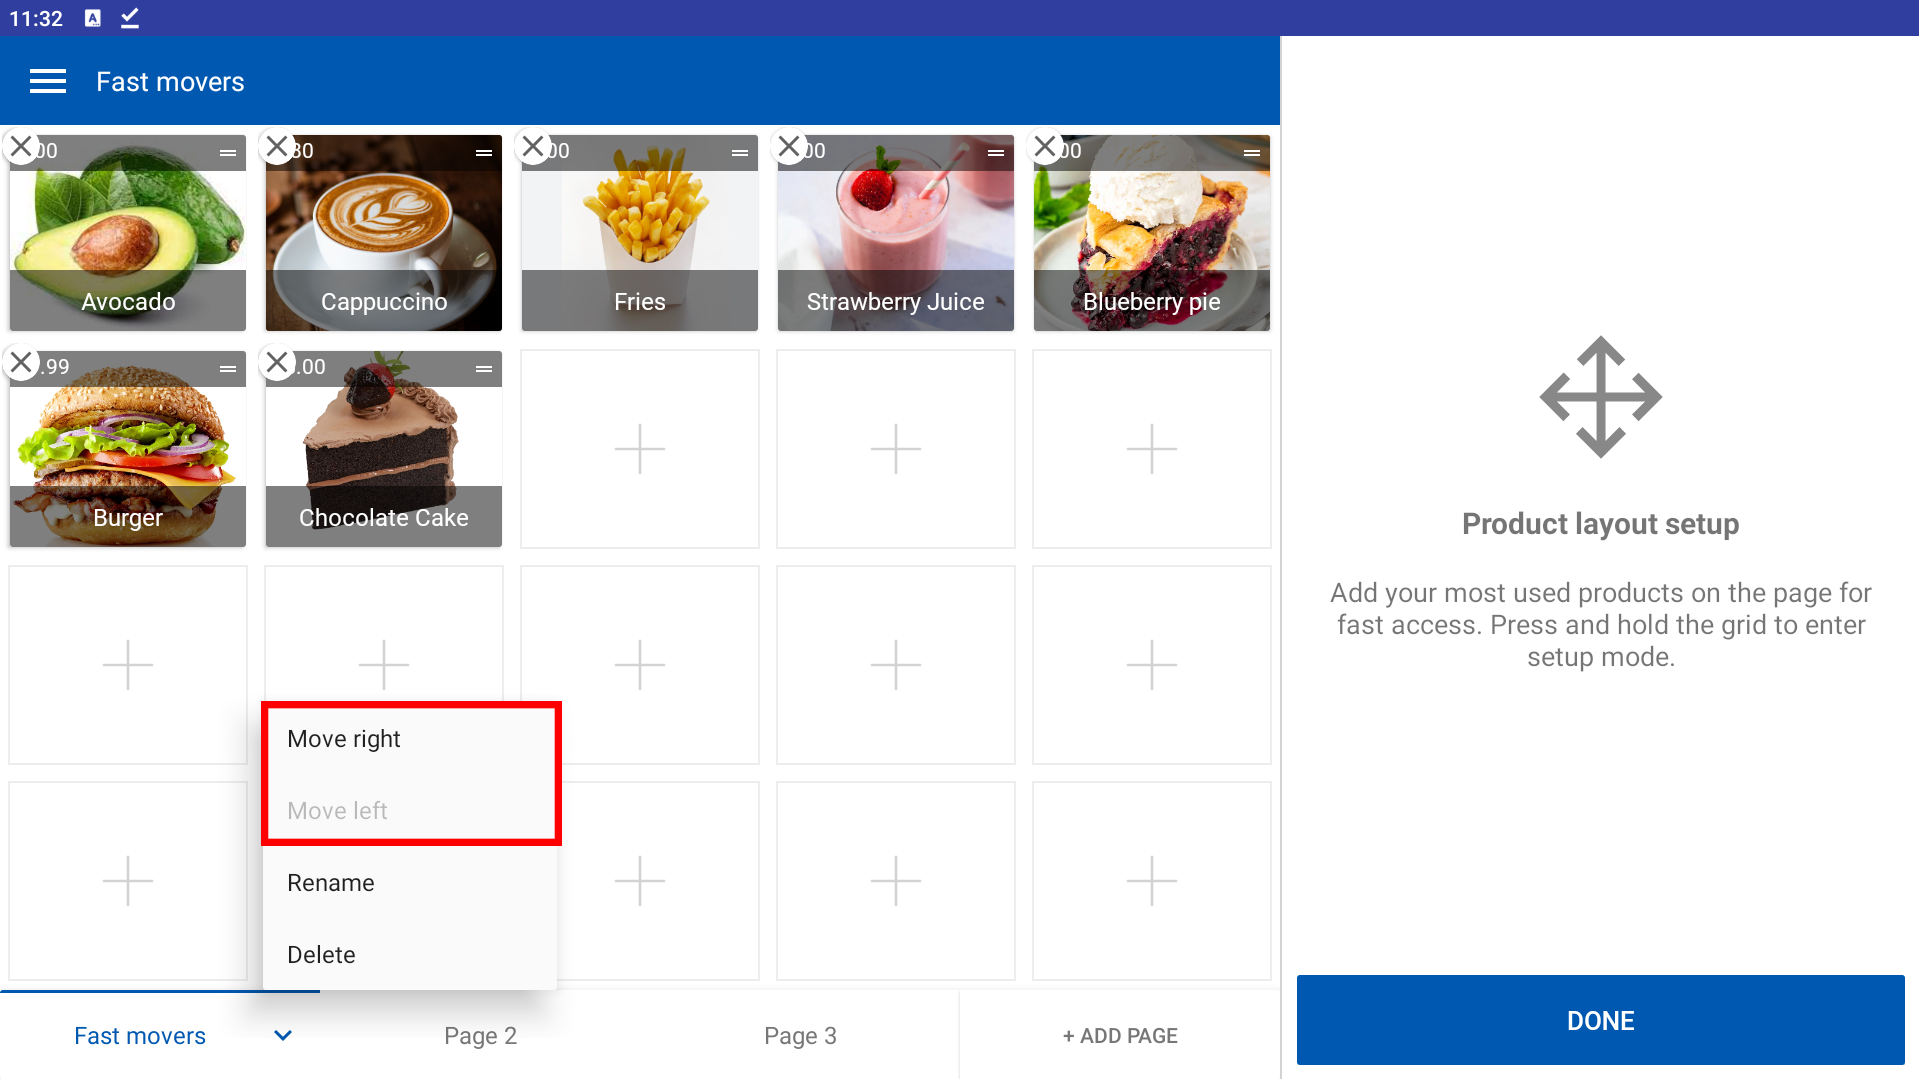
You can rearrange the order of your pages to reflect priority or convenience.
Steps:
- Open the POS App
- Go to the New Sale screen
- Select the page
- Long press to enter setup mode
- Tap the dropdown arrow next to the page name
- Choose Move Left or Move Right
- Tap DONE to save
Delete a Custom Sale Page
If a page becomes unnecessary, you can delete it to keep your POS clean and relevant.
Steps:
- Open the POS App
- Go to the New Sale screen
- Select the page
- Long press to enter setup mode
- Tap the dropdown arrow next to the page name
- Select Delete and confirm
Special Notes
- You can create up to 6 custom sale pages
- Each page can hold up to 20 products
- If you REPLACE or switch devices, your custom pages will be deleted and need to be recreated
- The "Customize Sale Screen" feature in Vendtill POS is currently available only in landscape mode.
If you're using portrait mode, you can use the "Favourite Products" option instead.
For more details on the Favourite Products feature.
This guide should help you get the most out of the Customize Sale Screen feature in Vendtill POS. Personalizing your sales interface will enhance team efficiency and provide a smoother customer experience.
Related Articles
Let's Make Your First Sale and View Past Receipts
1. Let’s get started with your first sale and learn how to view past receipts! Vendtill POS App 2. Edit product details You can now: Adjust the product quantity Apply a discount Remove items from the cart Let us know if you have any questions! 3.Once ...How to Add Products to the Favorite Category
Favorite Product Feature Step-by-step guide Favorite product feature with a customizable product position. The Favorite Products feature in the Vendtill POS App is available only in portrait mode. If you're using landscape mode, you can access a ...Vendtill Web POS – Retail Layout
Vendtill Web POS – Home Screen Layout & Quick Cash Option Step-by-step Vendtill Web POS allows businesses to customize the home screen layout to meet specific operational needs. This flexibility ensures enhanced usability, improved workflow, and ...How to Setup Home Screen Layout in Vendtill Web POS App
How to Setup Home Screen Layout in Vedtill Web POS App Vendtill Web App 1. Setup Home Screen Layout in Vendtill Web POS App Vendtill offers you three options to choose when setting up the home screen layout. Here's how to do it. Login to Vendtill web ...Customizable Fixed Charges
Customizable Fixed Charges in Vendtill POS Step-by-step guide In many businesses, particularly in the food and beverages and hospitality sectors, it is common to impose additional fees on customers. For example, restaurants may add a "Delivery ...